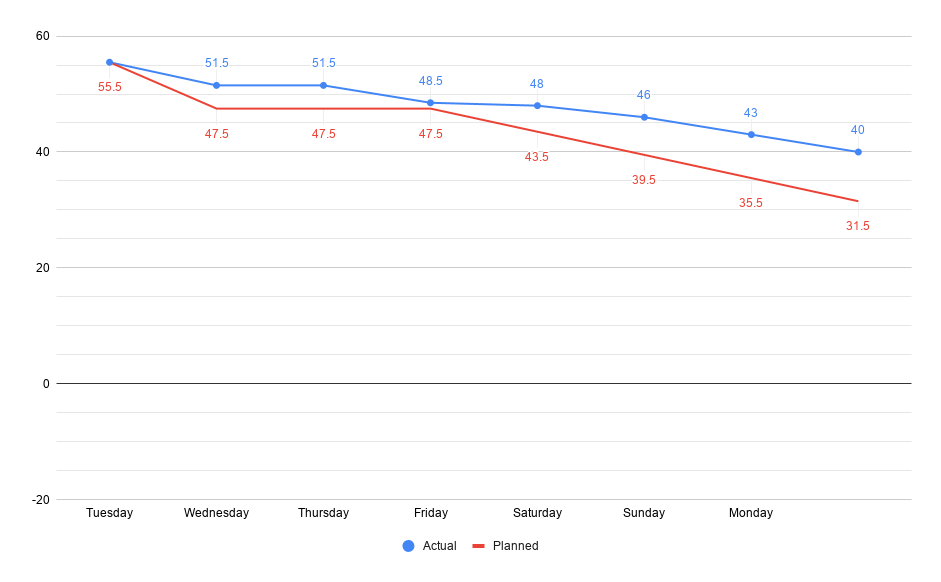
Unfortunately, due to other work the week prior, this project had to be started in what was intended to be the second week of development and is a catch-up week. Though I didn't completely catch up this week, I managed to make up about one third of the last week's time. For more detail, see the project board.

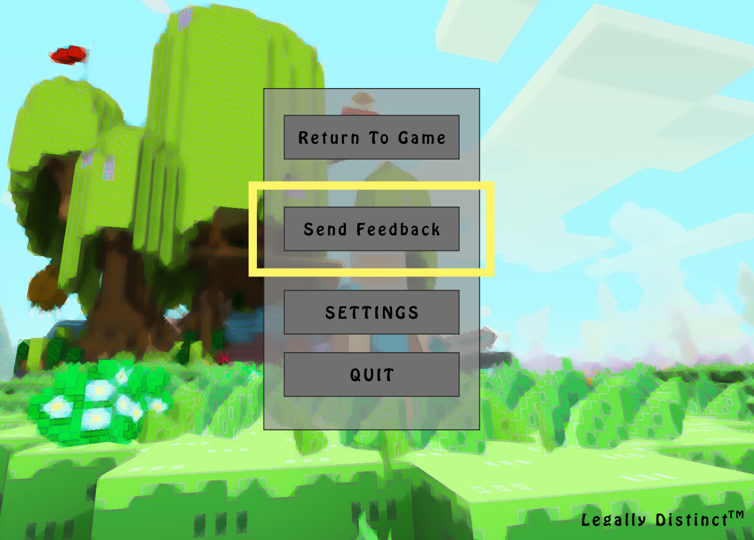
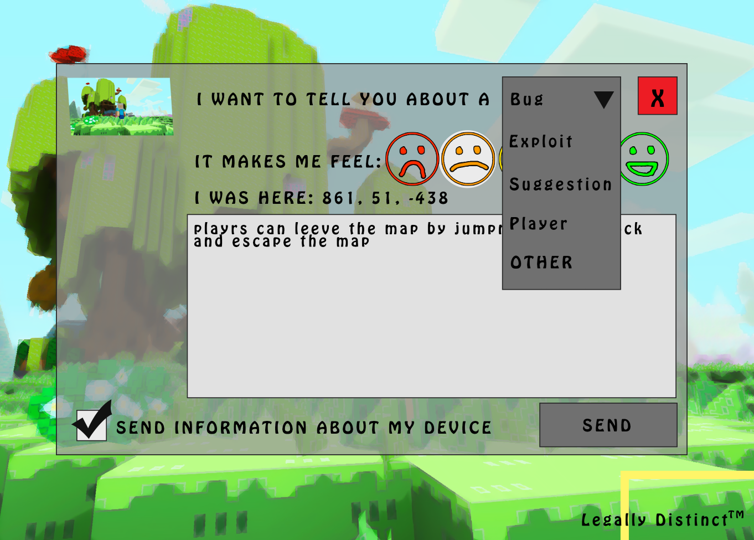
This gif demonstrates the state of the UI elements of the project at the end of the week. So far, the UI is opening and closing, laid out roughly according to the design, and the dropdown and buttons are functional.
Learning Unreal
The beginning steps of working on my industry project is starting to learn how to interact with the Unreal Engine. I decided to start my journey into Unreal by exploring it's built-in tutorial system through the lens of unity, which guided me through all the elements of the editor.
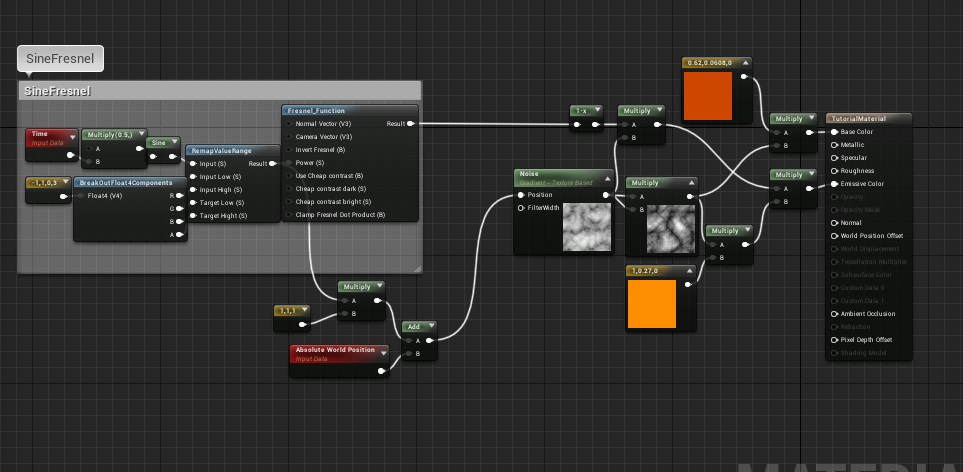
During this process, I found myself experimenting with the material editor borne of my familiarity with Unity's new rendering pipelines, and made a couple of cool effects.
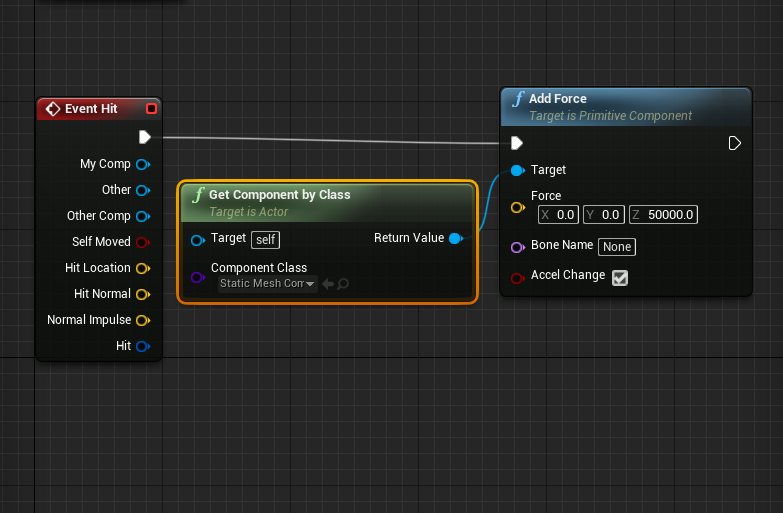
I then began to experiment with scene objects and blueprints, deciding to make an object interact with the world in unintuitive ways.
Building the Prototype UI
The next step for the week was beginning the prototyping process for the UI elements of the project, as per my initial mock-ups. This process expanded upon my rough understanding of the Unreal Engine's Blueprints, and by the end of the process I felt very comfortable programming visually.
Taking the Screenshot
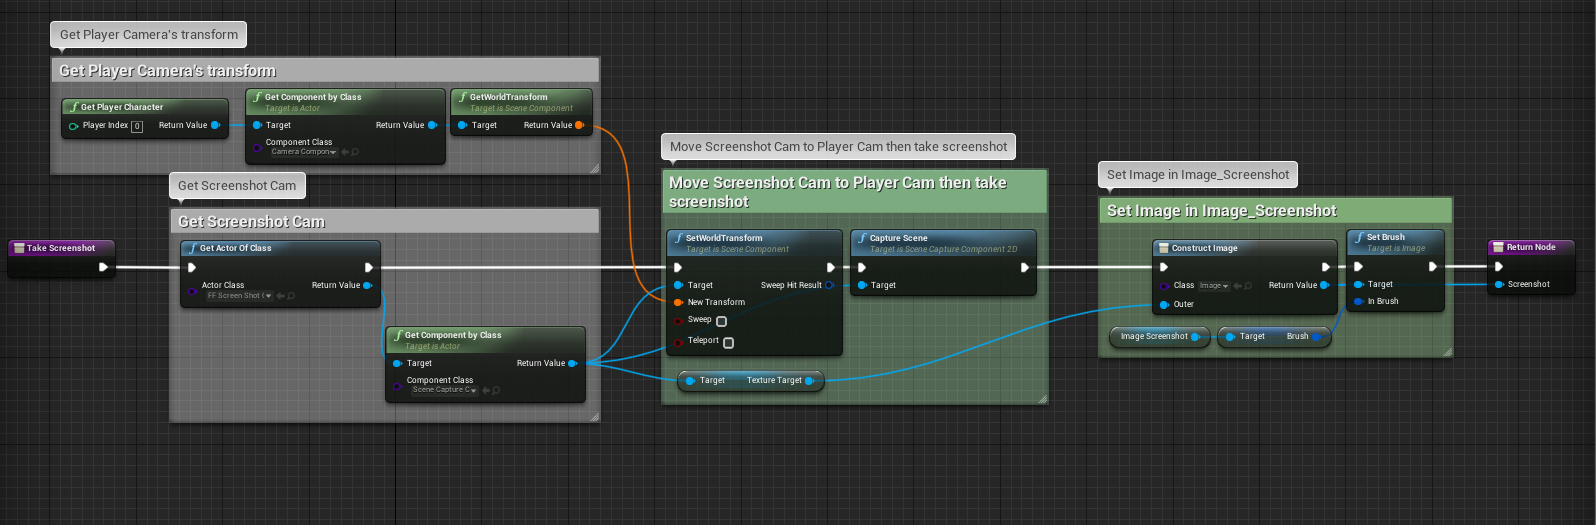
Taking the screenshot felt like the perfect next step as conceptually it was the next most complex part of the design. This proved itself quickly true, as I encountered difficulties in trying to keep frame overhead low, mismatched type errors, and determining which type of camera to use.
I discovered that the SceneCapture2D camera was the camera which would serve my purpose best, and that it was not able to be spawned and destroyed in code. This was solved by creating a blueprint of the object, finding it by class, then manually capturing the scene.
Finally, when I had reworked my screenshot functions, I tested it by creating a material from the render texture and applying it to a cube in the scene demonstrating that the rendertexture is only updated when the submit feedback panel is opened.